As a solar mounting manufacturer with over 20 years experience, We know that the selection of structural materials directly determines whether commercial or large-scale photovoltaic systems can operate safely and reliably for more than 25 years.
Currently, the global photovoltaic market tends to use two high-performance materials: anodized aluminum alloy (AL6005-T5) and zinc-aluminum-magnesium (ZAM) coated steel. Although both possess excellent corrosion resistance and durability, their roles in practical engineering applications are quite different. We will analyze the differences between these two core materials from the perspectives of manufacturing and engineering, and provide precise material selection strategies for specific project scenarios.
1. Quick Material Comparison: Aluminium vs. ZAM
Before delving into the application scenarios, it is necessary for us to first understand the differences between these two materials:
|
Feature / Property |
Anodized Aluminium (AL6005-T5) |
Zinc-Aluminum-Magnesium (ZAM) Steel |
|
Weight |
Ultra-lightweight (approx. 1/3 the weight of steel) |
Medium-Heavy (high structural density) |
|
Corrosion Resistance |
Excellent (via controlled anodizing layer) |
Outstanding (via continuous self-healing chemical film) |
|
Structural Strength |
High tensile strength for optimized profiles |
Extreme yield strength for high wind/snow loads |
|
On-Site Modification |
Easy to drill/cut; won't rust at cuts |
Self-healing cut edges protect against raw rust |
|
Recyclability & Value |
Nearly 100% recyclable with high scrap value |
High structural lifecycle value, low maintenance |

2. Scenario-Based Selection: Which Wins Where?
There is no "best" option; only the material that is most suitable for your project. Here are the methods for making the selection based on specific application scenarios:
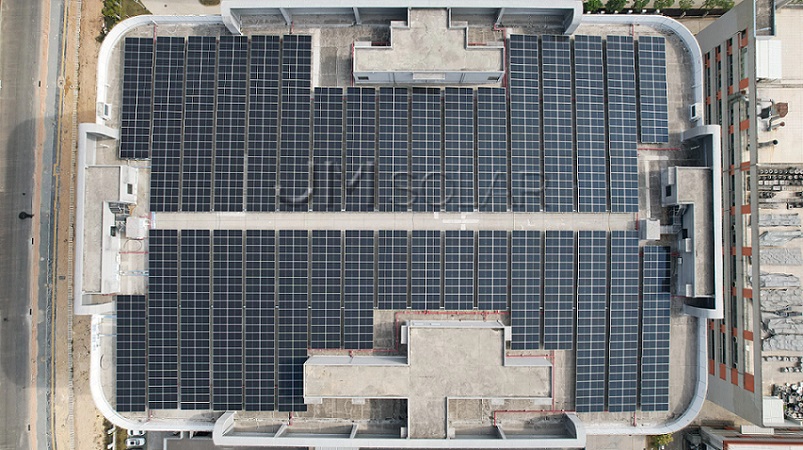
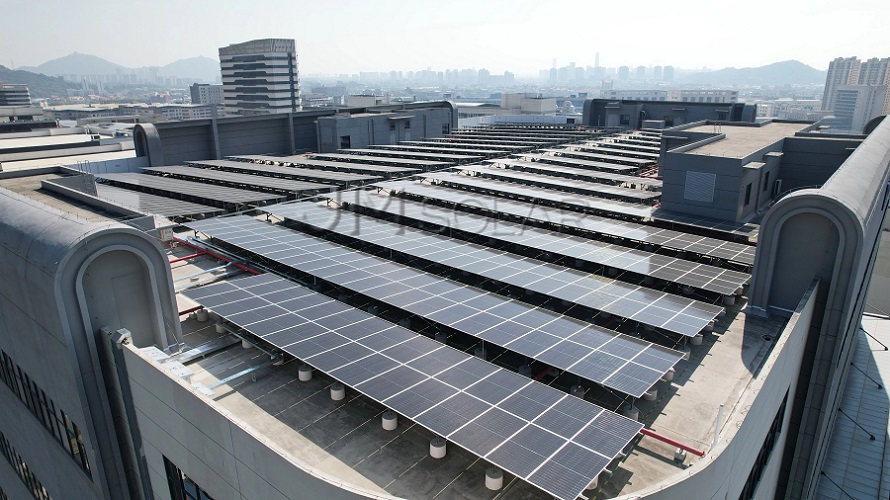
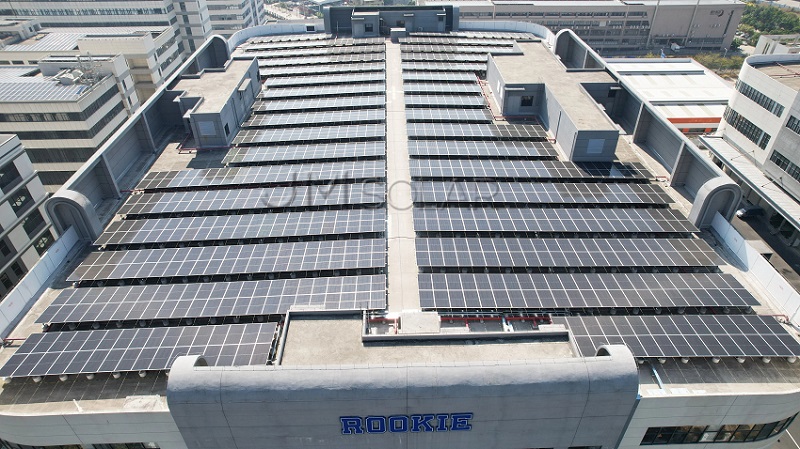
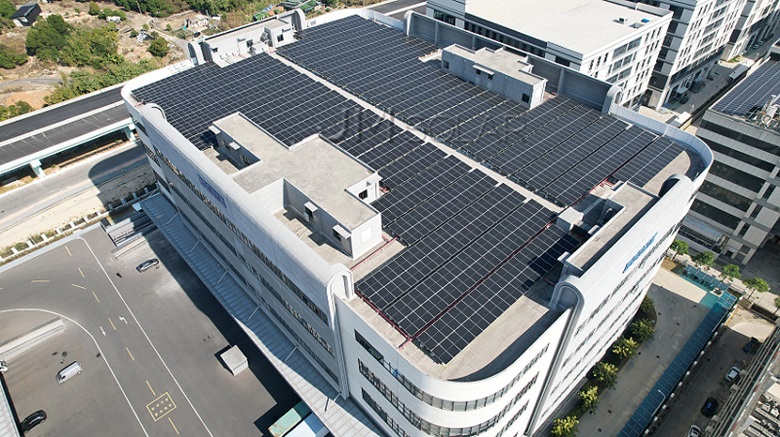
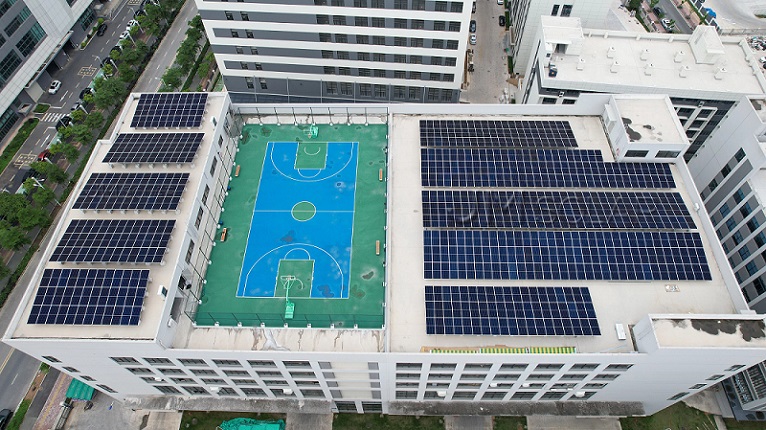
Scenario A: C&I and Residential Rooftops Solar Mounting
The Winner: Anodized Aluminium (AL6005-T5)
Why it matters: The roof project is constrained by the roof's load-bearing capacity and the high local labor costs. Our high-grade lightweight aluminum solar mounting rails and can minimize the load on metal roofs or tile roofs. Additionally, our XR rails, D rails,and pre-assembled solar panel clamps (including both mid clamps and end clamps) arrive from the factory 100% ready to deploy., making the on-site installation faster, saving labor costs, and eliminating the need for excessive tools.
Roof Mounting Type
Product Picture
Our Case


Explore Artsign‘s aluminum brackets for rooftop
Scenario B: Large-Scale Ground Mounts
The Winner: Zinc-Aluminum-Magnesium (ZAM) Steel
Why it matters: The utility scale ground mounted solar structures and solar farm system require a large structural span and must withstand extreme wind loads and snow loads. ZAM steel offers the high-strength structural rigidity required for tracking systems and fixed foundations at a highly competitive cost per watt. For agricultural photovoltaic projects, the supports are exposed to soil and moisture, and ZAM's outstanding toughness ensures decades of undamaged us.
ZAM Steel Ground Mounting System


Explore Artsign‘s ZAM Steel brackets for ground mounting
Scenario C: High-Salinity Coastal & High-Humidity Areas
The Winner: Depending on Structure Type
Why it matters: Traditional hot-dip galvanized steel is difficult to adapt in coastal areas due to accelerated corrosion caused by salt fog.
For coastal roofs solar structure,anodized aluminum is the best choice. For ground arrays close to the ocean,ZAM is the ideal option. When ZAM steel is scratched or cut during mechanical installation, the magnesium and aluminum in the coating will form a dense protective zinc-based film covering the exposed edges, automatically "healing" the wounds and preventing rust from occurring.
3. The Engineering Insight: Balacing ROI and Lifespan
For EPC and solar distributors, tracking the project return on investment (ROI) requires striking a balance between the initial procurement budget and the long-term operation and maintenance (O&M) labor costs.
Aluminum can reduce structural weight, lower transportation costs and on-site labor hours, making it the highest ROI choice for modular, quick-install rooftop layouts. ZAM steel significantly reduces material costs in large-scale open-air sites for public facilities, while ensuring zero-maintenance rust protection. Traditional steel cannot achieve this here.
As a manufacturer of solar mounting, we don't believe in a one-size-fits-all bracket. Our engineering team utilizes advanced software simulations to calculate precise wind and snow load tolerances based on your local building codes, matching the perfect balance of AL6005-T5 and ZAM structural elements for your bill of materials (BOM).
For any inquiry of solar panel mounting system, pls contact us, E-mai: sales@artsign.net.cn, Whatsapp / Wechat / Skype: +008618030235875, thanks